| WELCOME |
|
|
| <<BACK |
03.02.03 08:13:59 PM
|
Mercedes W126 dashboard HID LEDs conversion |
|
| Step 1: |
 First
thing, you got to find yourself a big flat screwdriver and go find your
Mercedes First
thing, you got to find yourself a big flat screwdriver and go find your
Mercedes |
| Step 2: |
 Use
a big flat screwdriver to pry the dash out, but becareful because you
might damge the padding. The other way is to use Mercedes dash
removal tool to remove it, this way you won't damage your padding. Use
a big flat screwdriver to pry the dash out, but becareful because you
might damge the padding. The other way is to use Mercedes dash
removal tool to remove it, this way you won't damage your padding. |
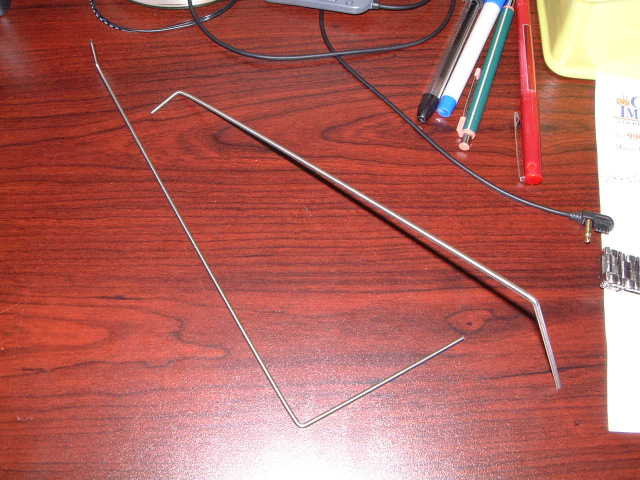 These
are my dash removal tools. There not fron MB, I built these myself.
You can easily build them yourself. All you have to do to remove the
dash is to slip one on each side, the hooks will hook the dash and
pull the dash out. This way, you won't have to damage your padding
trying to pry it out with a screwdriver. These
are my dash removal tools. There not fron MB, I built these myself.
You can easily build them yourself. All you have to do to remove the
dash is to slip one on each side, the hooks will hook the dash and
pull the dash out. This way, you won't have to damage your padding
trying to pry it out with a screwdriver. |
|
| Step 3: |
 Unplug
every connector in the back of it, don't worry about remembering where
each one of them hooks up to, every connector is different. Unplug
every connector in the back of it, don't worry about remembering where
each one of them hooks up to, every connector is different. |
| Step 4: |
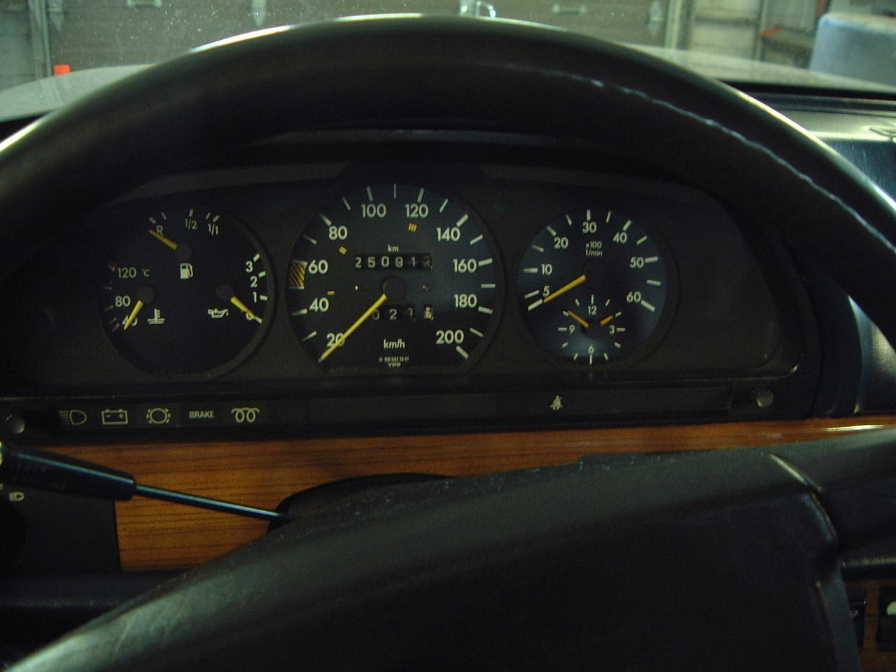
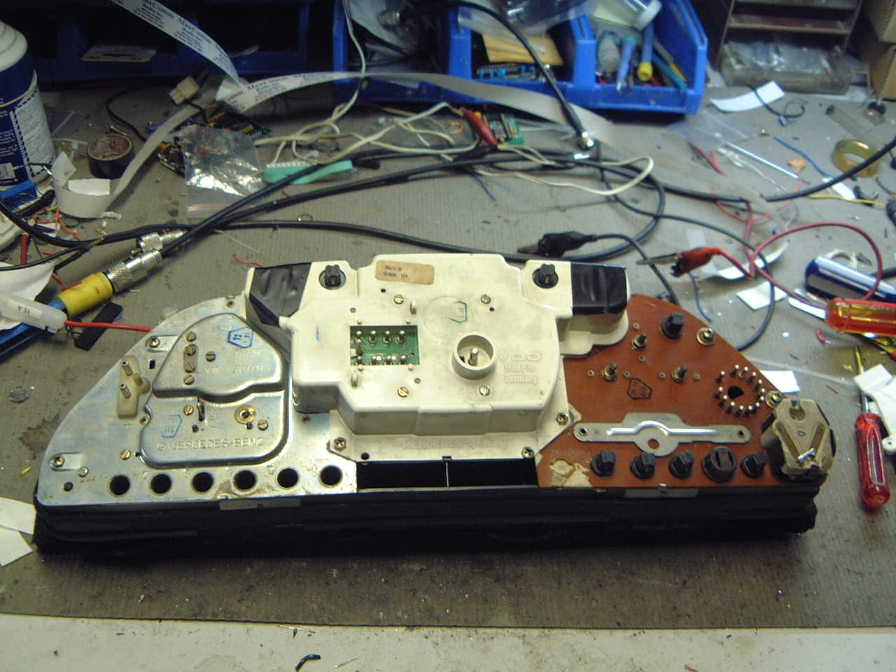
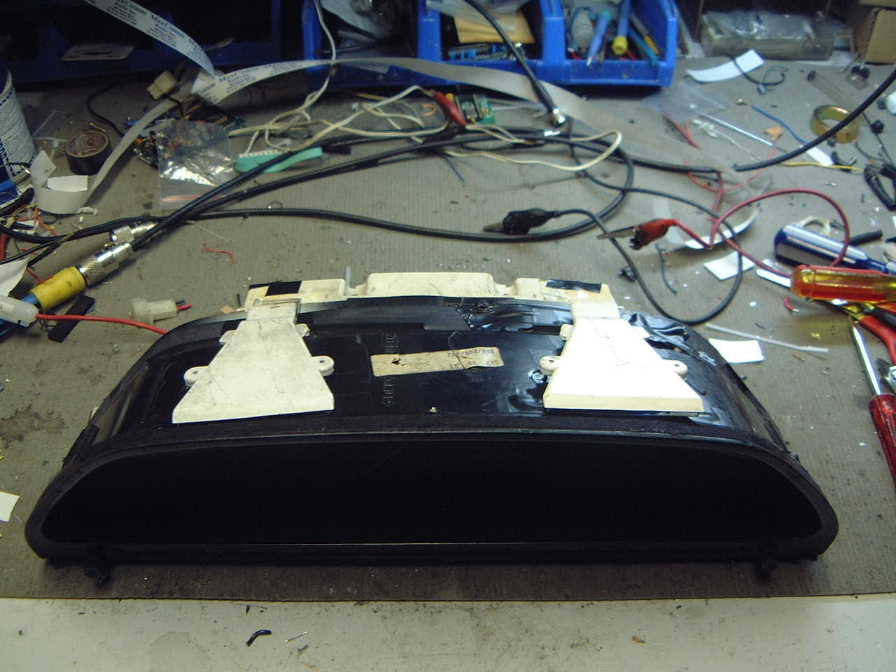 After
removing the dashboard, this is what it looks like. The two white
triangle on top are the reflectors. They reflect the light from the
back of the dashboard to the gauge cluster. This is the way they
used to make dashlights. The gauge are solid aluminium, so no light
will pass trough them. If your dashlights are functional and bright
at night, you don't have to remove them, if so remove the reflectors (STEP
5) If your reflectors are still good, there's another way to do
it but I never tried it because my reflectors are no longer good. After
removing the dashboard, this is what it looks like. The two white
triangle on top are the reflectors. They reflect the light from the
back of the dashboard to the gauge cluster. This is the way they
used to make dashlights. The gauge are solid aluminium, so no light
will pass trough them. If your dashlights are functional and bright
at night, you don't have to remove them, if so remove the reflectors (STEP
5) If your reflectors are still good, there's another way to do
it but I never tried it because my reflectors are no longer good. |
| Step 5: |
 Flip
it over to see the back. All you have to do is to remove all the
screws holding the white center part which hold the speedo and the
odometer. remove the 4 flat screws holding the plastic cover
to the circuitboard (around the 8 pin connector). Then removing the
remaining 6 phillips screws holding the cover to the back of the dashboard. Flip
it over to see the back. All you have to do is to remove all the
screws holding the white center part which hold the speedo and the
odometer. remove the 4 flat screws holding the plastic cover
to the circuitboard (around the 8 pin connector). Then removing the
remaining 6 phillips screws holding the cover to the back of the dashboard. |
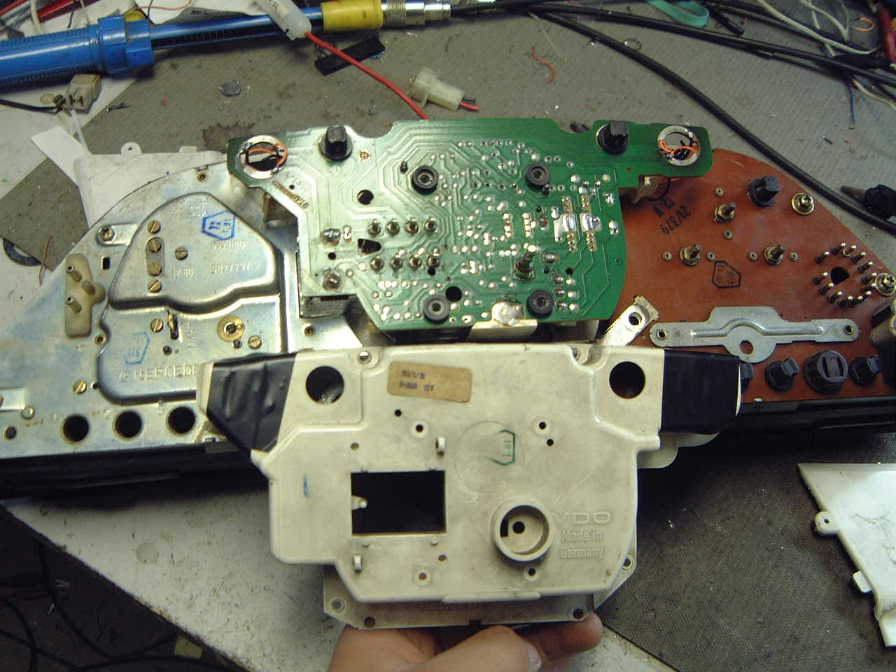 After
removing the white plastic cover, pry out the two reflectors on top with a
a flat screwdriver. Now there are four light at the top of the
circuitboard. The two closed to the center are for the blinkers.
Remove the two lights furthest from the center by turning them, those are
the light for the dashboard. After
removing the white plastic cover, pry out the two reflectors on top with a
a flat screwdriver. Now there are four light at the top of the
circuitboard. The two closed to the center are for the blinkers.
Remove the two lights furthest from the center by turning them, those are
the light for the dashboard. |
|
| Step 6: |
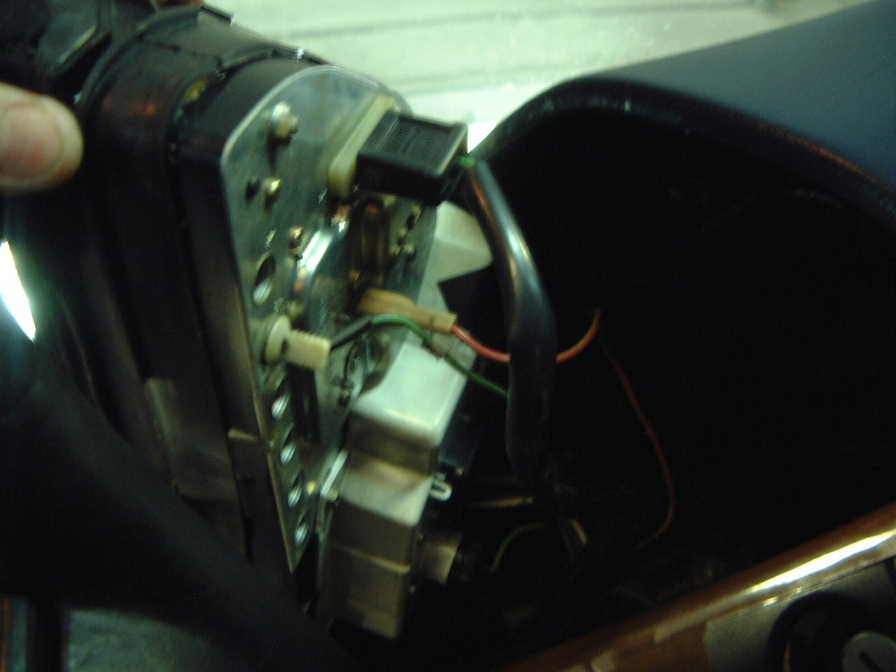
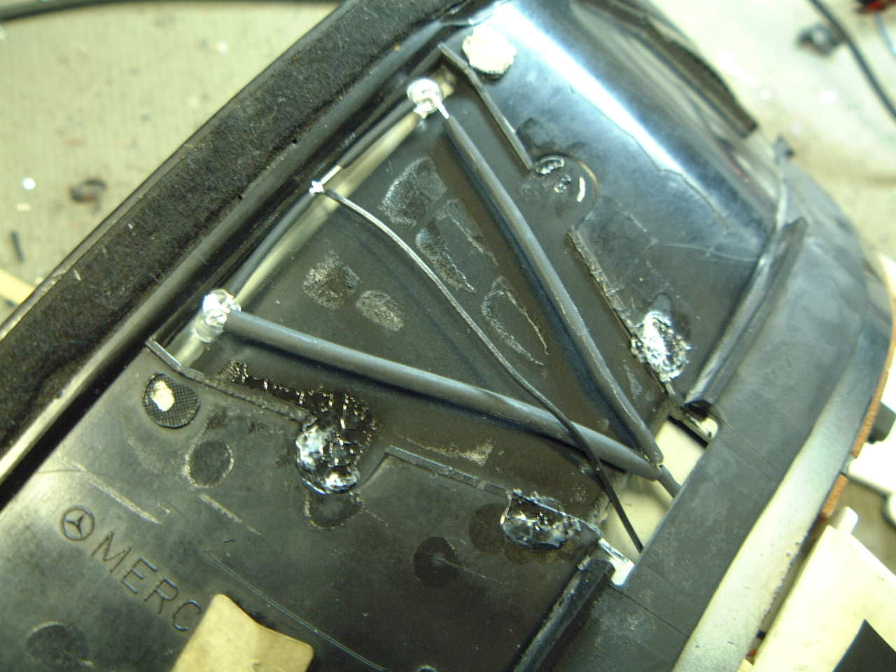
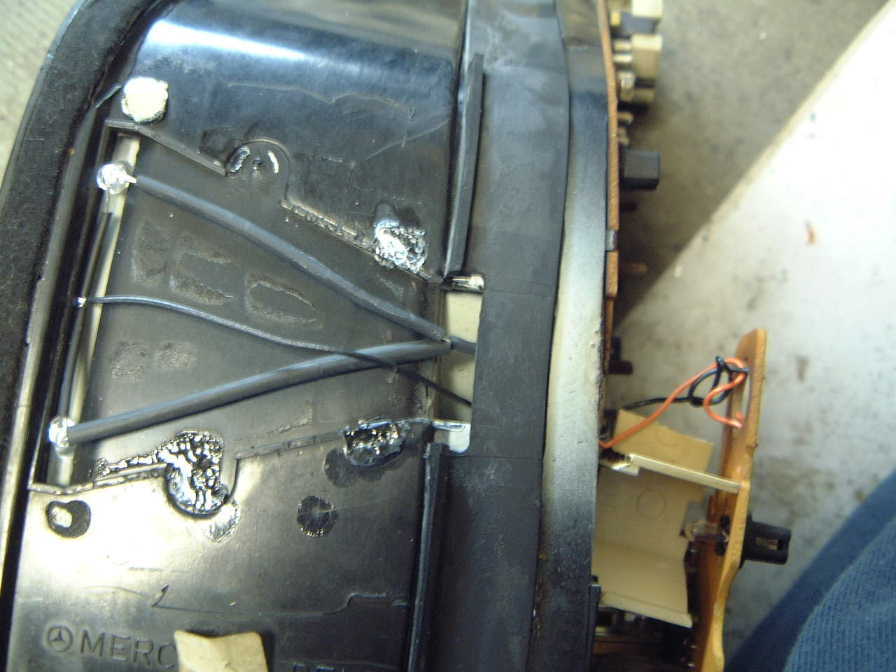
 This
is a close up of the socket where you just removed the lights for the
dashboard. The top is ground (-negative) and the bottom is positive
(+12V). Find a solder gun and some wire and solder one wire for each
of the prints (ground and +12V). Do the same thing for the other
side. The wires should be long and the reflector, they should reach
the front of the dashboard. This
is a close up of the socket where you just removed the lights for the
dashboard. The top is ground (-negative) and the bottom is positive
(+12V). Find a solder gun and some wire and solder one wire for each
of the prints (ground and +12V). Do the same thing for the other
side. The wires should be long and the reflector, they should reach
the front of the dashboard. |
| Step 7: |
 Now
here comes the tricky part. You have to built what is show is this
pictures. What you need is 2 HID LEDs, 2 390KOhms resistors, some
shrinking tube, a solder gun and a some solder. All you have to do
is to put the 2 LEDs is parallele. Solder a 390KOhms resistor to each
positive legs of each LED. The positive leg is the longest one.
Then put some shrinking tube (or tape) on the leg with the resitor and
solder the positive les together. Then solder the negative legs (the
shortest one, the one without a resistance) of both LEDs together.
Solder the negative wire to the negative legs and the positive wire to the
positive legs (ones with resistors). Repeat with the other side. Now
here comes the tricky part. You have to built what is show is this
pictures. What you need is 2 HID LEDs, 2 390KOhms resistors, some
shrinking tube, a solder gun and a some solder. All you have to do
is to put the 2 LEDs is parallele. Solder a 390KOhms resistor to each
positive legs of each LED. The positive leg is the longest one.
Then put some shrinking tube (or tape) on the leg with the resitor and
solder the positive les together. Then solder the negative legs (the
shortest one, the one without a resistance) of both LEDs together.
Solder the negative wire to the negative legs and the positive wire to the
positive legs (ones with resistors). Repeat with the other side. |
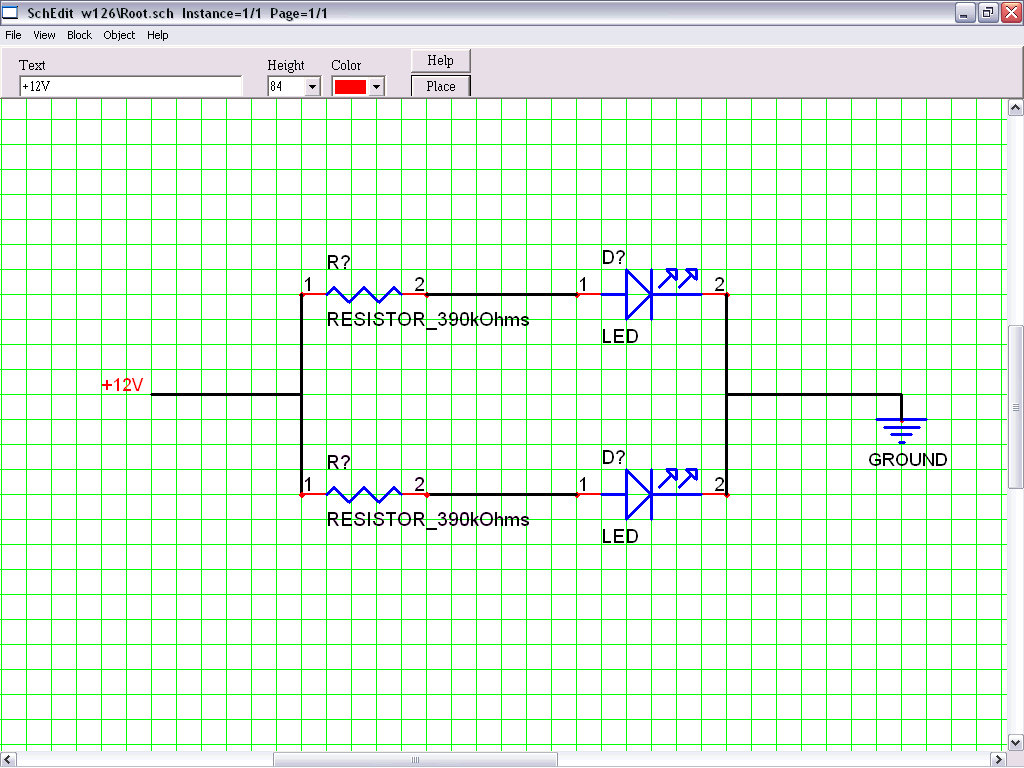 Here's
the schematics for the LEDs connections. Here's
the schematics for the LEDs connections. |
|
 It
should look something like this. Carefully place the LEDs into the
slot so that they can't bee seen from the face of the dashboard.
Also, you should test it before to be sure that the LEDs don't shine up on
too the glass of the dashboard (you'll see two blue spot when your looking
at the gauges) It
should look something like this. Carefully place the LEDs into the
slot so that they can't bee seen from the face of the dashboard.
Also, you should test it before to be sure that the LEDs don't shine up on
too the glass of the dashboard (you'll see two blue spot when your looking
at the gauges) |
|
| Step 8: |
 Tape
everything up so that the wire and LEDs don't pop up, they should be flush
with the dashboard. Finally close up and screw everything back up.
Then go back to your car, connect all the connectors. Now, before
putting it back in, test it by turning on you dimmer switch, then you can
put is back in by just pushing it back into it's place. And that's
all folks. Tape
everything up so that the wire and LEDs don't pop up, they should be flush
with the dashboard. Finally close up and screw everything back up.
Then go back to your car, connect all the connectors. Now, before
putting it back in, test it by turning on you dimmer switch, then you can
put is back in by just pushing it back into it's place. And that's
all folks. |